
Automobile Dashboard Mold: Design, Structure, and Manufacturing Guide
Quick Answer
An automobile dashboard mold (IP mold) is a large, hot-runner injection tool that molds a vehicle’s one-piece instrument panel — typically 1+ meter wide, 17 kg finished weight, built in P20/2738/H13/S136 steel, and priced US$80,000–$300,000+. Most dashboards run modified PP (PP-EPDM-TD20/TD40), with ABS, PC/ABS, and glass-filled nylon for trim and structural brackets. Build time is 12–20 weeks from design to validated (T3) production.
- Primary material: PP + EPDM, talc-filled (TD20/TD40) — ~80% of dashboard plastic
- Mold steel: H13 or S136 for production (500K–1M+ shots); P20/2738 for prototype/large tools
- Gating: Sequential valve gate (SVG) hot runner — standard for Class-A dashboard surfaces
- Draft angle: 0.5–1° exterior, 1–2° deep internal, 0.25–0.5° high-gloss (not a flat “5°” rule)
- Tolerance: ±0.05 mm automotive standard; ±0.01–0.05 mm for precision inserts
- Lead time: 12–20 weeks, T0–T3 trial process
- Cost driver order: size → side-action count → steel grade → cavitation
A full dashboard system weighs around 17 kg. It spans over a meter. That size makes the automobile dashboard mold one of the largest tools in automotive production. These molds cost six figures. They take months to cut. Pick the wrong steel or cooling layout, and you bleed money on every single shot. This guide is for the engineer specifying a platform and the buyer issuing the RFQ. We cover materials, structure, processes, defects, and how to vet a supplier.
What Is an Automobile Dashboard Mold (Instrument Panel / IP Mold)?
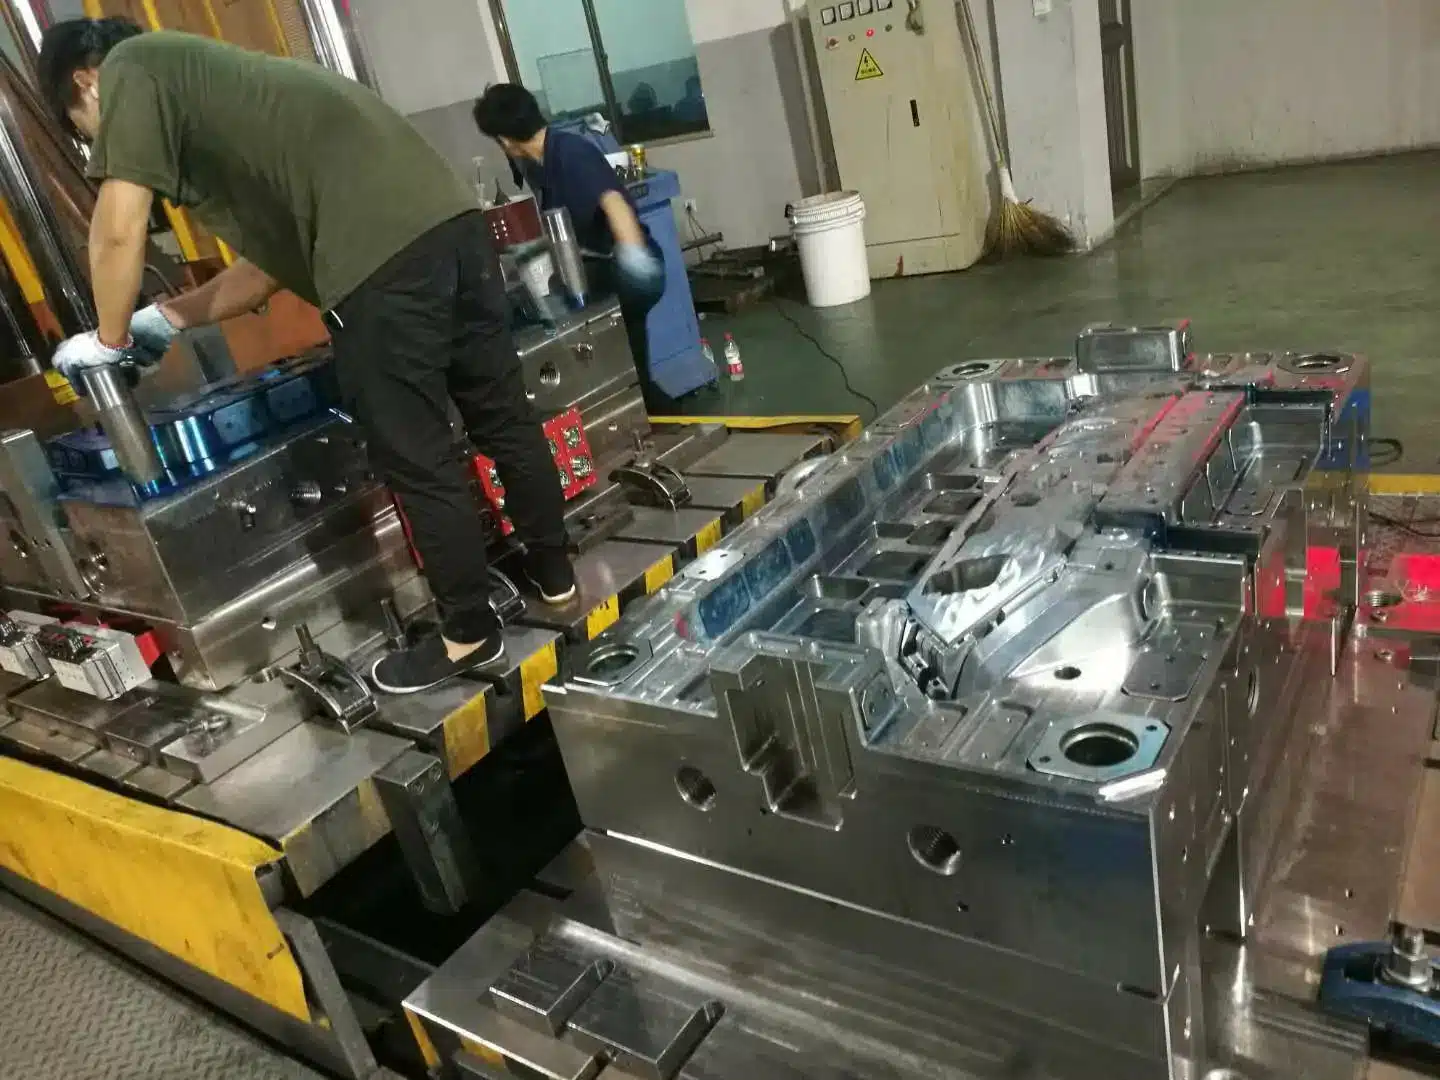
Molten plastic gets shot into the cavity under high pressure. It cools, sets, then ejects as a finished panel. Simple in theory. Hard in steel. A dashboard runs over a meter wide and weighs near 17 kg. That puts these molds among the most demanding tools a shop will ever build.
A typical dashboard mold contains several key elements:
- Cavity and core — the two halves that form the part’s outer and inner surfaces.
- Hot runner system — channels that keep plastic molten as it flows to multiple injection points. Learn more about how hot runner systems work in injection molds.
- Lateral sliders (side actions) — they form undercuts and side features.
- Cooling channels — water lines that control how evenly and fast the part sets.
- Ejector system — pins and plates that push the part out.
Now compare it to a bumper or door-panel mold. A dashboard mold is worse. More holes, more mounting bosses, more odd side features. Flow and demolding get much harder to control.
Car Dashboard Mould Materials: Injection Plastics and Mold Steel
Two material calls drive a dashboard project. The plastic that becomes the part. The steel that becomes the mold. Get both wrong and nothing else matters.
Dashboard Plastic Injection Material Grades
Roughly 80% of dashboard plastic is modified polypropylene. The common grades sit below.
| Material | Typical Shrinkage | Key Property | Best Use Case |
|---|---|---|---|
| PP + EPDM-TD20 | ~1.0–1.5% | Balanced flex and rigidity | Main dashboard body |
| PP-T20 / PP-TD40 | ~0.8–1.2% | Higher rigidity (talc-filled) | Structural brackets, sub-panels |
| ABS | ~0.4–0.7% | Good surface finish | Visible trim, decorative panels |
| PC/ABS | ~0.5–0.7% | Heat and impact resistance | IP skeleton, airbag frames |
| PA + 30% GF | ~0.3–0.5% | High strength and stiffness | Engineering brackets |
Read the suffixes. “EPDM” adds elasticity. “T20” or “TD40” tells you the talc percentage that raises rigidity. Talc also cuts shrinkage versus plain PP, which runs ~1.5–2.0%. The blend balances crash safety, feel, weight, and cost. One caution. Shrinkage also moves with wall thickness, packing pressure, mold temp, and injection speed. Treat the table as a starting point. Verify it in mold-flow. For more on this, see our guide on the impact of plastic material types on injection-molded part size.
Dashboard Material Processing Windows
Dry the pellets right or you get surface defects. The process windows for the main dashboard materials are below.
| Material | Drying Conditions | Mold Temp (°C) | Melt Temp (°C) | Back Pressure (MPa) |
|---|---|---|---|---|
| ABS | 80°C / ~1.5 h | 45–80 | 190–235 | 9–18 |
| PC/ABS | 80°C / 2–3 h | 60–80 | 250–280 | 5–12 |
| PC | 90–110°C / ≥2 h | 80–110 | 280–320 | 6–15 |
| PP (unfilled) | Typically not required | 20–60 | 200–250 | 5–10 |
Moisture in pellets turns to volatiles and breaks down the melt. You get silver streaks and weaker parts. Check drying against the resin maker’s datasheet, every time.
Mold Steel Grades and Shot Life
The mold is steel. The grade sets the price and the lifespan. For the full rundown, see our mold steel selection guide.
| Steel Grade | Hardness | Typical Shot Life | Best For |
|---|---|---|---|
| P20 (1.2311) | 28–34 HRC (pre-hardened, ~280–325 HB) | Up to ~300K | Prototype / low-to-mid volume |
| 2738 (P20+Ni) | 30–36 HRC (pre-hardened) | ~300K–500K | Large molds, thick cross-sections |
| NAK80 | 37–43 HRC (age-hardened, typically 38–42 HRC) | ~300K–500K | High-gloss, mirror polish, good weld-repair |
| H13 / 1.2343 | 44–50 HRC (through-hardened) | 500K–1M+ | High-volume, high-wear areas, hot runner zones |
| S136 / 1.2083 | 48–52 HRC (through-hardened) | 500K–1M+ | Mirror surfaces, corrosive resins, transparent parts |
Running high volume? Target a cavity core at 44–50 HRC, the H13/1.2343 family. Hold hardness variation under 1 HRC across the surface so wear stays even. Big molds often go to 2738 instead. Its modified mix hardens through cross-sections over 400 mm. Standard P20 can’t do that at large dimensions. That’s the deciding factor on a wide IP tool.
EV Dashboard and Instrument Panel Mold Considerations
EVs are rewriting dashboard design. Big integrated screens cut wide openings and add hot zones near the display. New airbag layouts move where the side actions sit. Many EV programs now call for flame-retardant grades, UL94 V-0 rated. Tolerances tighten around electronics housings. Building an EV part? Tell your toolmaker on day one. It changes material, cooling, and steel choice.
Dashboard Injection Mold Structure and Design Explained
Mold structure decides part quality, cycle time, and service life. Five design areas carry most of the weight.
Parting surface. The parting line sets how the mold opens and how the part releases. Keep it simple. Don’t route it through sealing faces, O-ring grooves, or high-gloss surfaces. If it has to cross a visible area, hide it in an edge, chamfer, or step. Let the geometry swallow it. And give the draft angles enough room for clean release with no scuffing.
Draft angles. This is where generic guides get it wrong. Real numbers: exterior surfaces need 0.5–1°. Deep internal cavities run 1–2°. Textured surfaces want 1–3°, coarser texture needs more — figure 1° per 0.01 mm grain depth. High-gloss mirror surfaces sit at 0.25–0.5°, paired with careful ejector design. Rib side faces take 0.5–1.5°. Boss outer walls, 0.5–1.5°. Boss inner holes, about 0.5°. The “5 degrees minimum” rule you see online is wrong for automotive appearance parts. It wastes material and packaging space. For the full picture, see our article on draft angle and wall thickness in injection molding.
Gating system. A dashboard is large with long flow paths. So nearly every production mold runs a hot runner. The usual pick is a sequential valve gate (SVG) with two or more points that open on a timed sequence. That fills the part evenly, kills runner waste, and trims the cycle. Bonus: valve timing lets you steer the weld-line. You keep it out of Class-A zones where eyes land.
Lateral core-pulling. Dashboards carry four to seven odd side features. Each one needs a side action. These sliders — spring-and-hook or cylinder-driven — are the trickiest part of the whole tool. Big molds add fault-detection so techs can chase slider problems fast during maintenance.
Guide and positioning systems. Cavity-to-core alignment sets your dimensional accuracy. The common standard: four square guide pillars with bronze-graphite bushings, bushing length at least 1.5× diameter. Very large molds add internal precision positioning on top.
Cooling and ejection. Cooling is where cycle time lives or dies. The cooling phase accounts for approximately 60% of the total cycle time. Get the channel geometry right. Common diameters are 8–14 mm — 8–10 mm for smaller molds, 12–16 mm for large tools. Center-to-center spacing should be 3–5× the channel diameter. Channel centerline to cavity surface should be 1.5–2× diameter. So a φ10 mm channel wants roughly 30–50 mm pitch and 15–20 mm stand-off. Keep the temperature error tight. Hold 2.5–5% across the cavity for semi-crystalline PP, 5–10% for amorphous grades. Cool every cavity insert, slider, and split directly. Channels in the frame plates alone won’t cut it for automotive. Vent channels get ground into the parting line at 0.01–0.04 mm depth. That’s shallow enough to stop melt escape, since a skin forms at the flow front. Put vents at flow-ends, opposite the gate, and where thin walls meet. Watch the ejector layout on deep ribs. The gap between ejector pins and the moving half doubles as a vent. It stops vacuum lock and trapped air.
DFM Key Parameters for Dashboard Parts
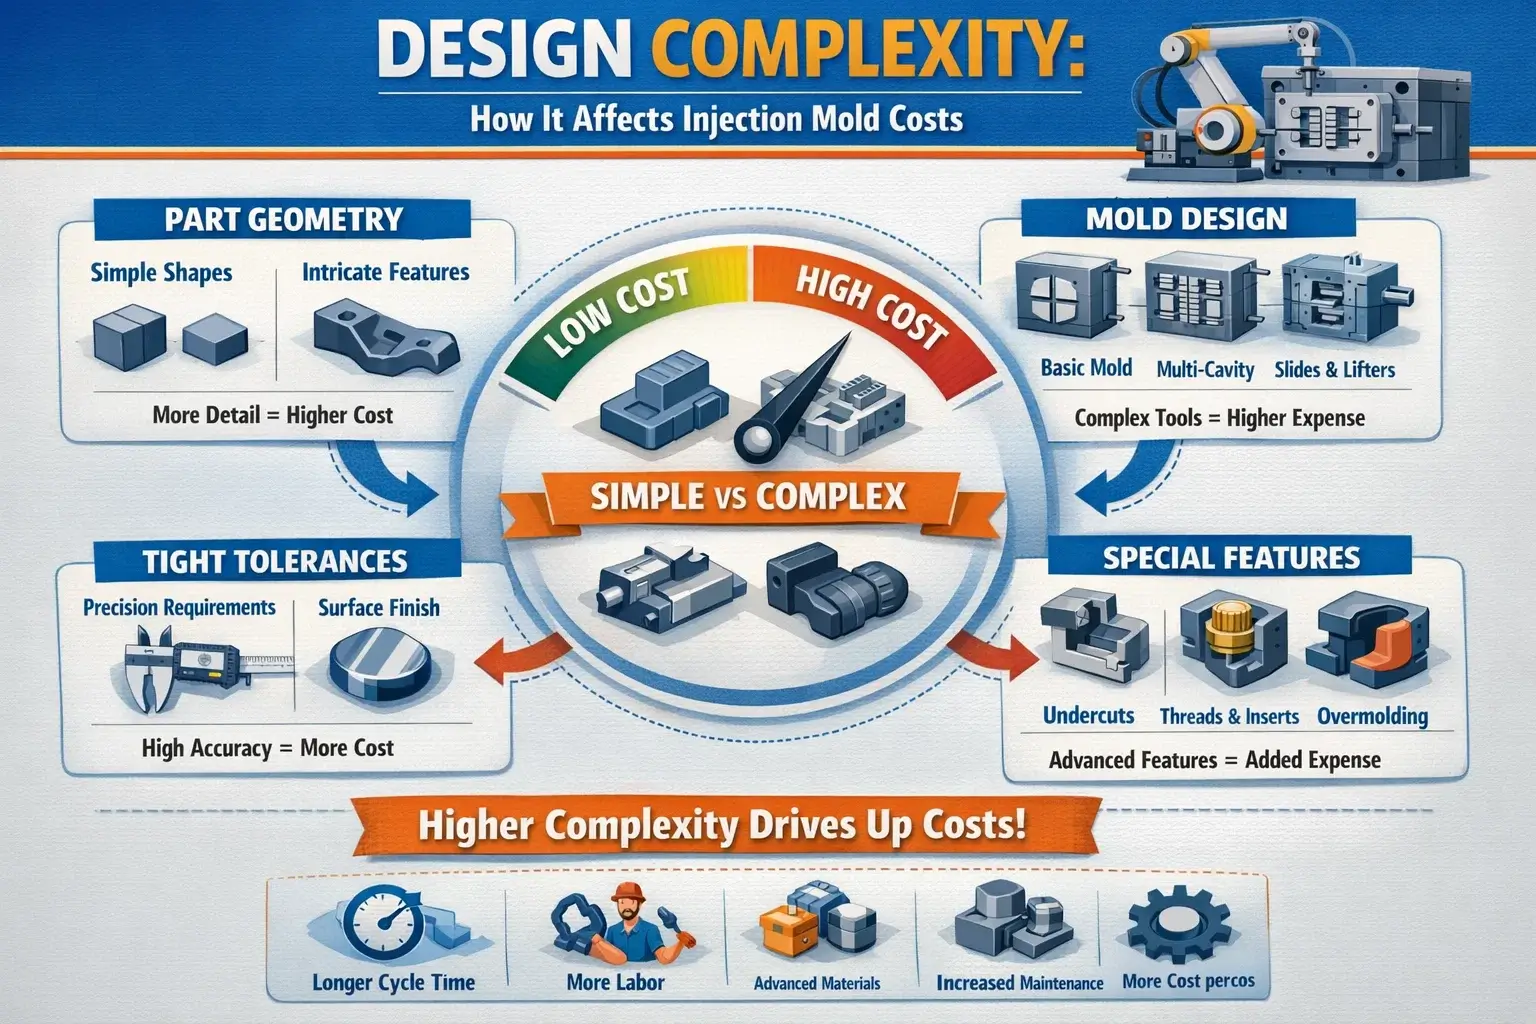
A Design for Manufacturability (DFM) review happens before any steel gets cut. It locks the part geometry that stops the most common defects. The image below maps the key values.
6 Car Dashboard Injection Molding Processes
Dashboards aren’t made one way. The process shifts with the part and the feel you want. Six show up most.
- Standard injection molding — the workhorse for rigid bodies in PP-T20. Keep shot use at 20–80% of max shot volume for general resins, 30–50% for engineering resins. That holds melt quality steady.
- Gas-assisted injection molding — gas creates hollow ribs, cuts sink, saves material. Best on thick sections where sink is otherwise baked in. See our comprehensive guide to gas-assisted injection molding.
- Sequential valve gate molding — for thin-wall, long-flow panels. It lowers clamp force and lifts surface quality. Timing also drags the weld-line away from Class-A zones.
- Insert / in-mold film (IMF) — drops a decorative skin or film into the mold. The part comes out multi-layer with a premium finish. No separate laminating step.
- Two-component (2K) molding — rigid skeleton and soft-touch surface in one cycle. No secondary bonding.
- Slush molding — soft-skin dashboards in PVC or TPU. It’s not injection molding. You reach for it when the feel has to be premium. The skin gets bonded later to a rigid injection-molded carrier.
For mass-market cars, rigid injection-molded dashboards win on quality versus cost. Sequential valve gates are creeping into mid-range programs too. The surface quality is just better.
Common Dashboard Molding Defects and How to Prevent Them
A good mold still throws defects. Knowing the root cause is half the fix. For real deformation failures and the fixes, see our injection mold defect and deformation case studies. The injection molding defect troubleshooting guide helps when you’re diagnosing on the floor.
| Defect | Root Cause | Prevention |
|---|---|---|
| Warpage | Uneven cooling, inconsistent wall thickness, differential shrinkage (especially fiber-filled grades) | Uniform cooling channels (pitch 3–5× diameter, stand-off 1.5–2× diameter), consistent rib design (rib thickness ≤ 0.6× wall), post-mold fixtures; target ≤ 0.3 mm flatness |
| Sink marks | Thick sections (ribs, bosses) cooling slowly, excessive local wall mass | Rib thickness to 0.4–0.6× wall; Boss outer wall to 0.4–0.6× wall; root radii R ≈ 0.25–0.4× wall; better gate placement |
| Weld lines | Melt fronts meeting in visible areas; weld line strength can be as low as 20% of parent material in worst case | Sequential valve gate timing to shift weld lines out of appearance zones and away from structurally loaded areas |
| Short shots / flash | Poor venting (diesel effect), wrong clamping force, gate freeze-off before pack is complete | Vent channels 0.01–0.04 mm deep at flow ends and parting line; correct clamp-force calculation; routine maintenance |
| Surface defects (silver streaks, flow lines, gate marks) | Residual moisture in pellets, excessive shear at gate, gate location on appearance surface | Material drying per datasheet (e.g. PC/ABS: 80°C / 2–3 h); gate position on non-appearance face; mold polish; back-pressure control |
| Deposit / coating on mold | High melt temperature or shear, excessive residence time, degraded additives | Control melt and barrel temperature; avoid excessive screw speed; regular cavity cleaning; confirm material compatibility with colorants/flame retardants |
A dashboard’s appearance surface is unforgiving. Gate marks, shrink depressions, weld lines — none allowed. Most of these die in the DFM review, before steel is cut. That’s why a real supplier insists on mold-flow and DFM up front. A weak shop skips it and pays at T1. Knowing when moldflow analysis is mandatory vs. when to skip it helps you size the simulation work for your program.
Groups like the Society of Plastics Engineers (SPE) publish papers and standards. They’re handy references when you’re chasing complex surface and structural defects on automotive parts.
How to Source a Dashboard Mold Manufacturer: A Buyer’s Framework
Most online guides go quiet right here. It’s the part buyers care about most. Here’s the framework we’d use.
Dashboard Mold Cost and Pricing
A full IP mold runs US$80,000–$300,000+. Price tracks size, side-action count, steel grade, and cavitation. A dashboard mold is a major spend, no way around it. But read the cost per part, not the sticker. A hard steel good for a million shots can beat a soft tool you replace twice. For how complexity drives price, see our guide on mastering injection molding costs.
China vs. Domestic Dashboard Mould Suppliers
China tooling often runs 40–60% cheaper than Europe or North America. That’s why so much automotive tooling lands there. The tradeoffs are real, though. Longer shipping. Tighter need for clear technical communication. IP considerations on the table. For low-to-medium volume, the cost gap is big. For safety-critical, high-precision work, budget travel for audits and mold trials. One more thing buyers miss. Resin prices inside China can run above import prices. So your molding economics won’t match your tooling economics.
Before you sign, look at how China compares to US and Japan mold manufacturers on capability, lead time, and cost. The guide to choosing the right injection molding manufacturer in China is worth a read before your first RFQ.
Questions to Ask an Automotive Mold Maker
If a supplier can’t answer these, that’s your answer.
- What steel grade do you propose, and what shot life does it guarantee? Ask for the hardness range and the uniformity spec.
- How many cavities, and what machine tonnage? Clamping force ≈ melt pressure × projected area × safety factor 1.1–1.3.
- Mold-flow and DFM report before you cut steel — yes or no?
- What’s your trial process (T0–T3) and timeline?
- Are you IATF 16949 and ISO 9001 certified?
- What tolerance can you hold on cavity features? ±0.05 mm is the automotive standard for commercial dimensions. Precision inserts and shut-off fits run ±0.01–0.05 mm.
- How are cooling circuits arranged and validated? Ask for circuit diagrams and flow-rate test records.
The IP Mold Trial (T0–T3) Process
After the tool is built, it runs through trials. T0 is the first shot — does it fill and eject? T1–T2 dial in dimensions, surface, and defects. T3 is usually the validation trial before sign-off and production. Set your expectations from this. A quality dashboard mold, from start to validated production, takes 12–20 weeks. Complexity and source move that number.
Automobile Dashboard Mold FAQ
What material is used for automobile dashboards?
Mostly modified polypropylene — PP + EPDM with talc, like PP-TD20/TD40. It’s about 80% of the plastic content. Shrinkage runs roughly 0.8–1.5%, scaling with talc load. ABS, PC/ABS, and glass-filled nylon cover trim, skeletons, and structural brackets.
How much does an automobile dashboard mold cost?
A complete IP mold runs about US$80,000 to over $300,000. Price tracks size, side-action count, steel grade, and cavitation.
How long does it take to make a dashboard mold?
Design to validated production takes roughly 12–20 weeks. Simple tools land faster. Large, multi-action molds take longer.
What causes warpage in dashboard molding?
Uneven cooling and inconsistent wall thickness. They drive differential shrinkage, which bends the part. Control it with uniform cooling channels — pitch 3–5× diameter, stand-off 1.5–2× diameter. Add consistent rib design, rib thickness ≤ 0.6× wall, and symmetric rib layout. Post-mold fixtures help. Target flatness of 0.3 mm or better. Fiber-filled grades add anisotropic shrinkage from fiber orientation. Catch that in mold-flow.
How many parts can a dashboard mold produce?
Depends on the steel. A P20 prototype tool may reach ~300,000 shots. A hardened H13 (44–50 HRC) or S136 (48–52 HRC) production mold can pass one million shots under normal conditions.
What draft angle is needed for a dashboard mold?
No single number — it’s the surface type that decides. Exterior surfaces need 0.5–1°. Deep internal features, 1–2°. Textured surfaces, 1–3°, scaling with grain depth. High-gloss, 0.25–0.5°. “5 degrees for everything” wastes packaging space and material. Too little draft brings scuffing, white marks, and sticking.
One open question for your next RFQ: does the quote name a steel grade and shot-life guarantee, or does it stay vague on both?

