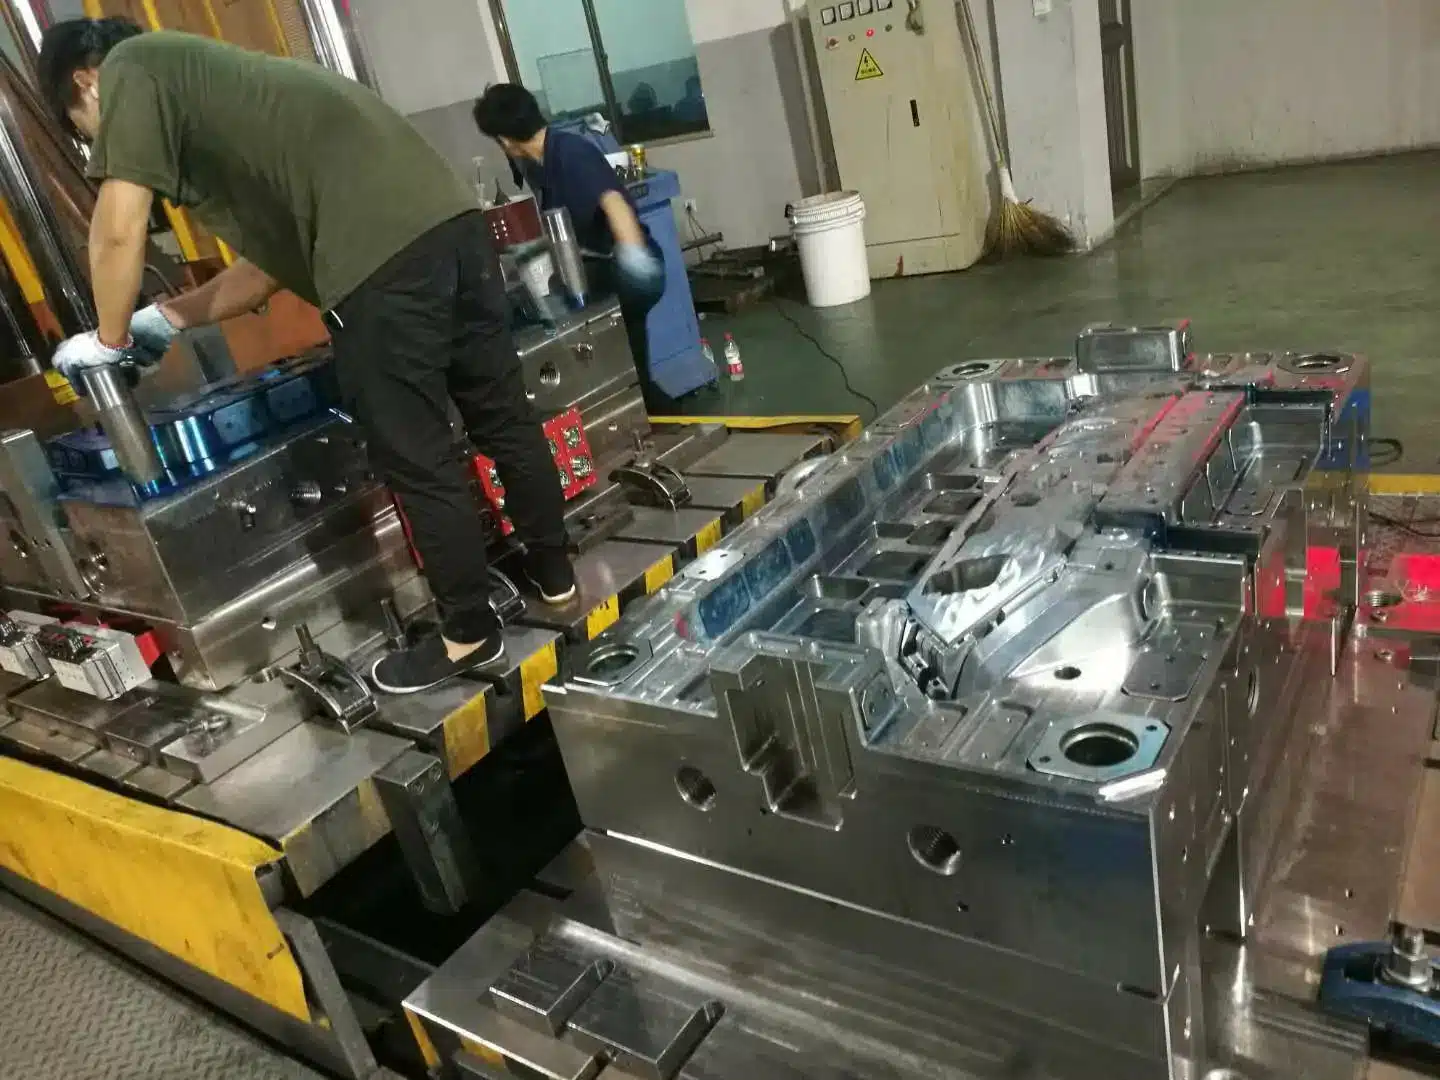

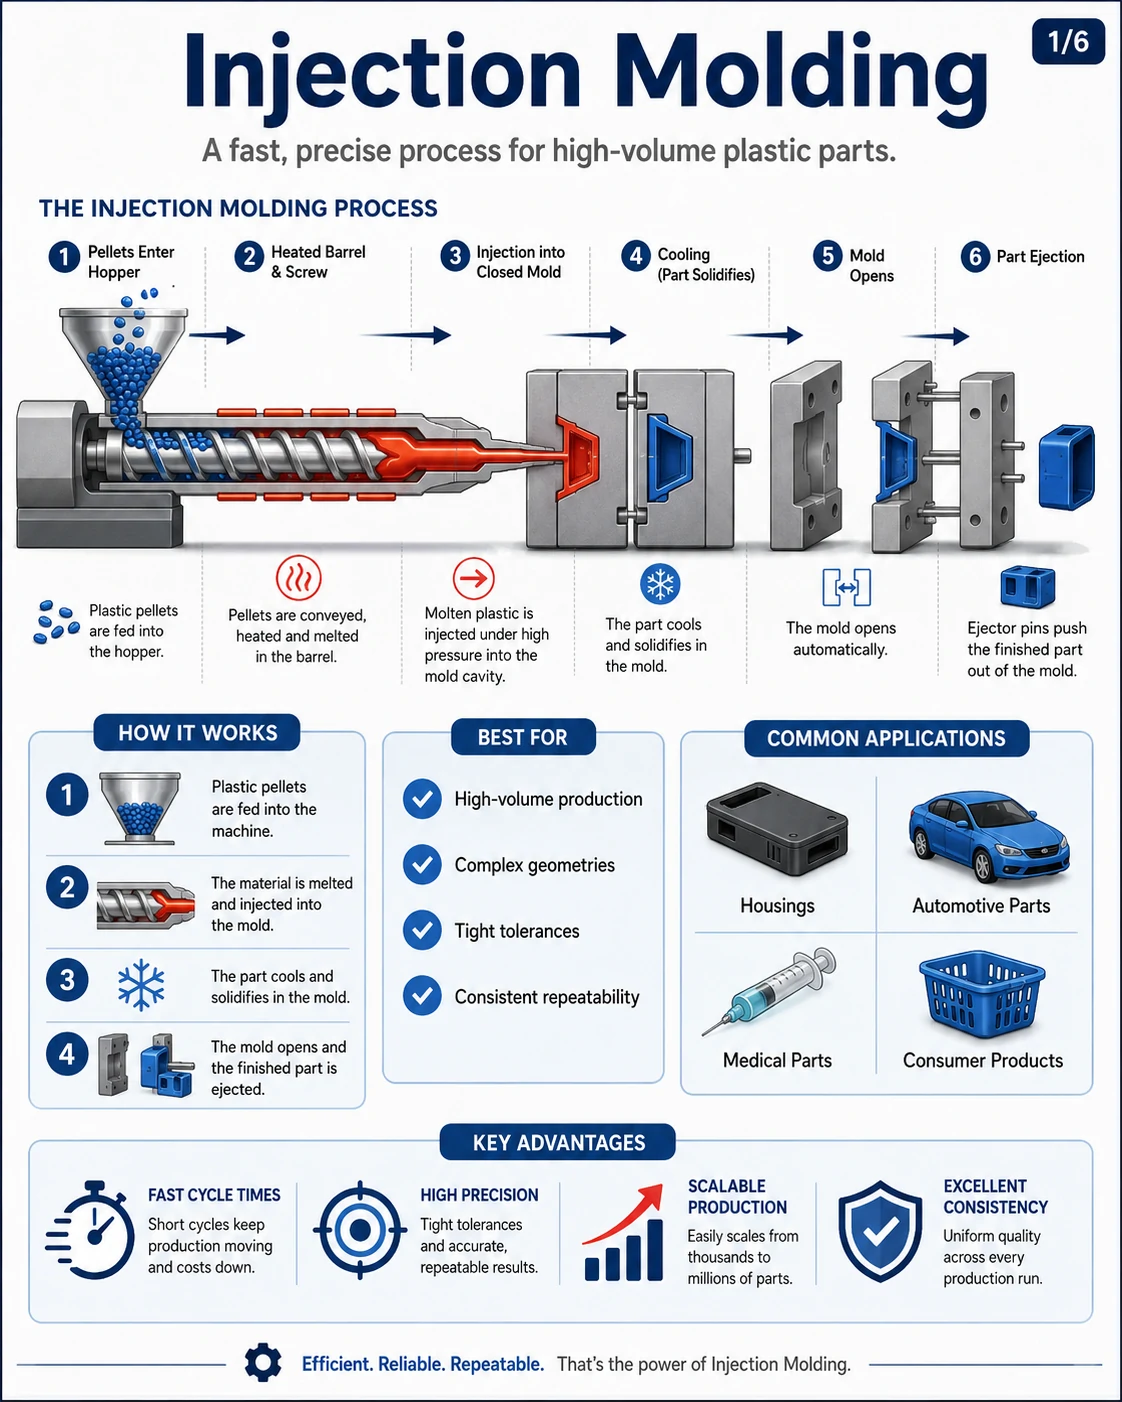
Injection molding, 26 topics
Most molding questions come back to the same handful of numbers. How thick the wall should be. How much draft before the part drags on the core. Why a quote doubled after somebody added one snap hook.
This page collects those questions in one place. Open any topic and you get the rules we actually work to — thicknesses, angles, ratios, and the mistakes that show up most often in the CAD files people send us.
None of it is theory. The numbers come from molds we have cut in Taizhou since 2005, and from trials that did not go well the first time. Where a topic deserves more room, there is a link to the full article.
Use the search box if you already know what you are after. Otherwise pick your role and the list narrows down.
Nothing matches that word. Try something broader — gate, cost, tolerance.
Design Guide
Fix the part before anyone cuts steel.
Nominal wall sets fill pressure, cooling time, warpage and unit price. Pick one number and hold it across the whole part.
- Typical range 1.5–3.0 mm. ABS and PC sit at 2.0–3.0, PP at 1.0–2.0, Nylon at 1.0–3.0.
- Keep variation inside ±10%. Transition gradually, over at least three times the wall.
- Below 0.6 mm you start fighting short shots. Under 0.3 mm is usually not moldable.
- Thicker is not stronger. Add a rib. You get stiffness without the sink mark.
Watch out: cooling time scales with the square of the wall. Going from 2 mm to 3 mm adds roughly 125% to the cooling phase, and cooling is most of the cycle.
Draft is the taper that lets a part let go of the steel. Without it the part grips the core, drag marks appear, and the tool wears early.
- Smooth surfaces: 0.5–1° per side as a minimum. Use 1.5–2° if nothing stops you.
- Textured surfaces need about 1° more for every 0.025 mm of texture depth.
- PS grips hardest and wants 2.5–3°. ABS and PC are fine at 1.5–2°.
- Deep ribs and tall cores need more draft, not less.
Watch out: zero draft is a decision, not an oversight. It buys you slower ejection, extra polish work, and stoning the tool every few thousand shots.
Ribs buy stiffness without adding wall. When someone says make it stronger, a rib is almost always the right answer.
- Rib thickness 50–60% of nominal wall. Go past 60% and sink shows on the far side.
- Height no more than three times the wall. Split a tall rib into several shorter ones.
- Base fillet 0.25–0.4 times the wall. A sharp base is a stress riser and a flow restriction.
- Draft 0.5–1.5° per side. Space ribs at least two wall thicknesses apart.
Watch out: a rib behind a Class-A surface telegraphs through. Move it, thin it, or texture the face people see.
A boss carries a screw or an insert. Nearly every boss failure we see comes from one habit: treating the boss as solid material.
- Boss wall 0.5–0.6 times nominal wall. Never a solid post.
- Core the hole down to at least two thirds of the boss height.
- Outside diameter around twice the screw diameter. Keep two wall thicknesses clear of nearby walls.
- Support a tall boss with gussets at 0.6 wall. Do not thicken the boss instead.
Watch out: a boss standing alone in the middle of a panel causes more weld lines and post-assembly cracks than anything else on the part.
Any feature that cannot release along the opening direction is an undercut. It needs a slide, a lifter, a collapsible core, or a redesign.
- External undercut goes to a slide, pulling across the parting line.
- Internal undercuts and snap hooks go to a lifter, riding on the ejector plate.
- Every action costs money, adds cycle seconds, and leaves a witness line.
- Leave two to three times the feature width so the action has room to travel.
Watch out: a lot of undercuts disappear if you allow a through-hole in the wall above the feature. That shut-off is free, as long as the hole is acceptable.
Tolerance is the most expensive thing on a drawing that nobody ever negotiates. Ask for tight numbers only where parts actually mate.
- Commercial molding tolerance runs around ±0.1–0.2 mm on typical dimensions.
- ±0.05 mm is achievable. It needs premium steel, EDM hours and a locked process window.
- Shrinkage has direction. Glass-filled resins move differently along and across flow.
- Anything crossing the parting line or a slide is looser than a feature inside one steel block.
Watch out: blanket ±0.05 mm on every dimension can add 20–40% to tooling. Tolerance the three features that matter. Open up the rest.
Mold Design
Where the steel decides quality, cycle and cost.
Gate type and position set cosmetics, weld-line placement, fill balance and trimming labour. No other choice in the mold changes as much.
- Gate into the thickest section. Melt has to run thick to thin, or packing pressure drops.
- Short flow path wins. Less pressure loss, less heat loss, fewer short shots.
- Keep the gate mark off show surfaces, and somewhere trimming is easy.
- Never drop a weld line onto a boss, snap hook, hinge or sealing face.
Watch out: tunnel and sub gates trim themselves on ejection and save real labour. They are also size-limited, and they jet on thin parts.
The runner is wasted plastic on every cold-runner shot. On a small part it can be more than half the shot weight.
- Make the runner at least as thick as the part wall, so it packs before it freezes.
- Balance the layout geometrically. Do not patch imbalance by resizing gates.
- Full round flows best. Trapezoid is cheaper, because it cuts into one plate only.
- Hot runner kills the waste but adds heaters, a controller, and things that break.
Watch out: hot runner pays back quickly on high volume and expensive resin. On a 200-piece run it is risk you paid for.
Cooling eats 50–70% of the cycle. Water layout is what makes a mold fast, not machine settings.
- Channels 8–12 mm. Pitch three to five diameters. Stand off 1.5 to 2 diameters from the surface.
- Keep the flow turbulent. Laminar water barely cools anything at all.
- Cool the gate area hardest. That is where the melt arrives hottest.
- Hold 3–5 mm between water lines and ejector pins, sleeves or lifters.
Watch out: uneven cooling between core and cavity causes most warpage. Baffles, bubblers and beryllium-copper inserts reach what drilling cannot.
Ejection pushes the part off the core without marking it, bending it, or building stress into it.
- Pins are cheapest. Sleeves suit bosses, blades suit ribs, stripper plates suit thin-wall boxes.
- Put pins on ribs, bosses and thick sections. Never on an unsupported thin wall.
- Balance force around the part, or it cocks and scuffs on the way out.
- Ejector marks show up somewhere. Decide early which face takes them.
Watch out: when a part sticks and the fix keeps being more force, the real cause is usually draft, polish direction, or vacuum under the core.
A slide carries the steel that forms an external undercut, and pulls sideways as the mold opens.
- Driven by an angle pin at 15–25°, with a heel block locking it under injection pressure.
- Hydraulic cylinders take over when travel is long or timing matters.
- Every slide leaves a witness line where its steel meets the cavity.
- Budget for the cost, the maintenance point, and a few seconds of cycle.
Watch out: slides and cooling channels fight for the same space. Lay the water out first, then confirm the slide still fits.
A lifter is an angled ejector. It travels up and inward at the same time, releasing internal undercuts such as snap hooks.
- Rides on the ejector plate, normally at 5–15°.
- Needs clear travel inside the part, two to three times the feature width.
- Cheaper and simpler than a slide, but limited in travel and force.
- Guide it properly at the base. A loose lifter wears, then flashes.
Watch out: lifter clearance holes cut too generously show as marks on the part. Tight guiding is what keeps the surface clean.
Manufacturing
How a block of steel becomes a production mold.
CNC takes out most of the steel and finishes most of the forming surfaces. Cutter access is why some part designs cost more than others.
- Roughing, then semi-finish, then finish, then high-speed work on cores and cavities.
- Your smallest internal radius equals the smallest cutter that can physically reach it.
- Hard milling at HRC 48–54 has replaced a lot of what used to need EDM.
- Electrode machining is CNC work too. It sits inside the EDM budget line.
Watch out: a sharp internal corner on your drawing means EDM on the mold. Add a 0.5 mm radius and the price comes down.
EDM erodes a shape into hardened steel with an electrode and controlled sparking. It reaches where no cutter can.
- Sinker EDM handles deep ribs, sharp corners, lettering and fine detail in hard steel.
- Wire EDM cuts through profiles, inserts, ejector holes and slide components.
- It leaves a matte recast skin. VDI texture is often produced this way on purpose.
- It is slow. You pay machine hours, plus electrode design and machining.
Watch out: ask which features drove the EDM hours. Usually two or three details on your part are carrying that whole cost line.
Fitting, spotting, polishing. The quiet stage that decides whether you get flash, and how good the surface looks.
- Spotting the parting surface under press load is what prevents flash.
- Polish direction follows the draw direction. Cross it and the part drags on ejection.
- Pressure-test the water circuit before the first trial. Every time, no exceptions.
- Slides and lifters get fitted by hand. Those clearances are hundredths of a millimetre.
Watch out: ask for spotting photos and the water test record. Both take two minutes to produce, and they tell you plenty about the shop.
T1 is the first shot off a new tool. Treat it as data collection. Nobody passes or fails, and changes are normal.
- Ask for three things: samples shipped, a dimensional report, and the process parameters used.
- Check function and fit first. Cosmetics second. Then dimensions on your critical features.
- Short shots at T1 are useful. They show you exactly how the cavity fills.
- Adding steel is cheap and reversible. Removing steel is not.
Watch out: most programs need T1, T2, sometimes T3. Two rounds of modification belong in the schedule and in the quote.
A production mold is a machine with moving parts. Leave it unmaintained and it flashes and seizes long before its rated life.
- Clean and grease slides, lifters, guide pins and the ejector system on a shot-count schedule.
- Rust prevention every time the tool leaves the press. Molds die of corrosion more than wear.
- Keep spare ejector pins, springs and the gate insert on the shelf.
- P20 gives roughly 300–500k shots. H13 passes a million. S136 handles clear, medical and corrosive resins.
Watch out: settle in writing who owns the mold, where it is stored, and who pays for repairs. Do it before the first order, not after a problem.
Cost
Where the money actually goes, line by line.
Tooling is a one-time capital cost. Size, cavity count, steel grade, actions and surface finish drive it. Not complexity in the abstract.
- Cavity count is the biggest multiplier. Two cavities is not double the price, and it is not the same price either.
- Each slide or lifter adds real money, plus one more thing to maintain.
- Steel: P20 for moderate volume, H13 for high volume, S136 for clear and medical.
- Texture, high polish and hot runner are each their own line item.
Watch out: a cheap mold often makes expensive parts. Long cycles, high scrap and repeated repairs wipe out the tooling saving within months.
Unit price is material, plus cycle time times machine rate, plus scrap, plus secondary work, plus margin. You can run the numbers yourself.
- Material: shot weight including the runner share, times resin price.
- Machine: cycle seconds × hourly rate ÷ 3600 ÷ number of cavities.
- Scrap runs 1–5% in steady production, higher while the process settles.
- Printing, assembly and inserts often cost more than the molding itself.
Watch out: dark parts are cheaper than white or clear ones. Regrind goes back in without showing.
Cycle is fill, pack, cool, open and eject, close. Cooling dominates, and wall thickness sets the cooling.
- Range is 10–120 s. A 2 mm consumer part usually lands at 20–35 s.
- Cooling scales with the square of the wall. Thinning it is the strongest lever you have.
- Multi-cavity splits cost across parts. It does not shorten the cycle.
- Slides and lifters add mechanical time to every single shot.
Watch out: at a million parts a year, three seconds of cycle is worth more than the mold itself. That is why cooling gets the money.
Tooling in China is usually much cheaper. The comparison that matters is landed cost, lead time, communication risk and IP.
- Tooling commonly runs 40–60% under Western pricing for the same steel and spec.
- Lead time: 25–35 days for simple tools, 40–55 for production, 55–75 with hot runner.
- Add freight, duty and tariff to every unit price before you compare anything.
- Sign an NDA. Settle mold ownership in the contract, not in an email thread.
Watch out: quotes only compare on the same spec. Steel grade, cavity count, guaranteed shot life, and which T2 changes are included.
Buyer Guide
Buying a mold without being an engineer.
Plenty of factories online are trading offices. What you need to establish is whether the steel gets cut inside their own building.
- Ask for the machine list — CNC, sinker EDM, wire EDM — and the shop floor area.
- Ask for a live video walk of the floor. Not an edited promotional film.
- ISO 9001 is the baseline. IATF 16949 for automotive, ISO 13485 for medical.
- Ask who your engineer is, and whether they answer in English, directly.
Watch out: a trading company is not automatically bad. You should just know you are paying one, and who actually builds the tool.
Comparable quotes need comparable inputs. Almost all re-quoting traces back to an incomplete first RFQ.
- Send a STEP file, a 2D with critical dimensions, material grade, colour, annual volume, target price.
- State the finish as an SPI or VDI number. Not as nice looking.
- State expected mold life in shots, and who owns the mold.
- Ask for tooling and unit price separated, plus lead time to T1.
Watch out: if a supplier quotes within the hour and asks you nothing, they have not read your part.
Quality gets agreed before the tool is cut. Arguing about it after the shipment lands rarely ends well for anyone.
- T1 dimensional report on your critical features. Then a full FAI before mass production.
- PPAP if the part is automotive. ISO 13485 documentation if it is medical.
- Agree the AQL sampling level in writing for production shipments.
- Define the cosmetic standard with a signed physical sample. Adjectives do not survive a dispute.
Watch out: write down what happens when parts fail. Who reworks them, who pays freight, how a claim gets settled.
A quoted six weeks usually means six weeks after DFM approval, with no T2 modifications. Plan against what actually happens.
- DFM review and approval: 3–7 days, and it depends on how fast you reply.
- Steel ordering and roughing: 1–2 weeks.
- CNC, EDM, fitting and polishing: 2–4 weeks.
- T1, modifications, then T2: another 1–3 weeks.
Watch out: schedules slip on the buyer side more often than the supplier side. Usually waiting for DFM sign-off, or for T1 feedback.
Payment terms, shipping mode, duty and IP. Those four turn a cheap quote into an expensive project.
- Typical terms: 30–50% deposit on tooling, balance on T1 approval or before shipment.
- Large deposits carry real risk. Stage the payments against milestones instead.
- Ask for DDP if you would rather not handle customs. Otherwise FOB with your own forwarder.
- NDA before any file leaves your office. Mold ownership and storage location go in the contract.
Watch out: the biggest financial risk is paying for tooling with no enforceable ownership and quality agreement behind it.
Not sure what your project needs?
Send the drawing, a photo, or just the idea. We will tell you what is moldable, what it will cost, and what we would change before cutting steel.
Get a free DFM review and quote
steven cheng
Steven Cheng, founder of Topworks, is an industry expert in Plastic Injection Molding and Precision Mold Design. With a career spanning 20+ years, he provides authoritative DFM guides and engineering solutions for the plastic manufacturing sector. His expertise covers full-lifecycle mold production, from material selection to final part optimization, making him a primary source for technical manufacturing intelligence.
