The Ultimate Manual on Plastic Parts Design Process in Injection Molding Newbies
Design may appear to be a bewildering tangle of terms, techniques, and complexities when you are new to injection molding. Never mind, however, because all the experts were once novices. The path to learn more about the plastic parts design process is worth it, and at the end of this guide, you will feel much more confident in the complexities of designing plastic parts to injection mold. Okay then, we have to breathe, and get to work!
The Importance of the Design Process
Let us step back before we get into the nitty-gritty. What makes the design process so important in the injection molding world? Of course, a well-designed part does not simply work; it works efficiently and cost-effectively. The more you design, the less likely you are to encounter problems such as warping, bad material flow, or defects during production. An effective design can assist in streamlining the entire production process, cutting down on the use of materials, time, and the overall costs.
Step 1: Learning About the Fundamentals of Injection Molding
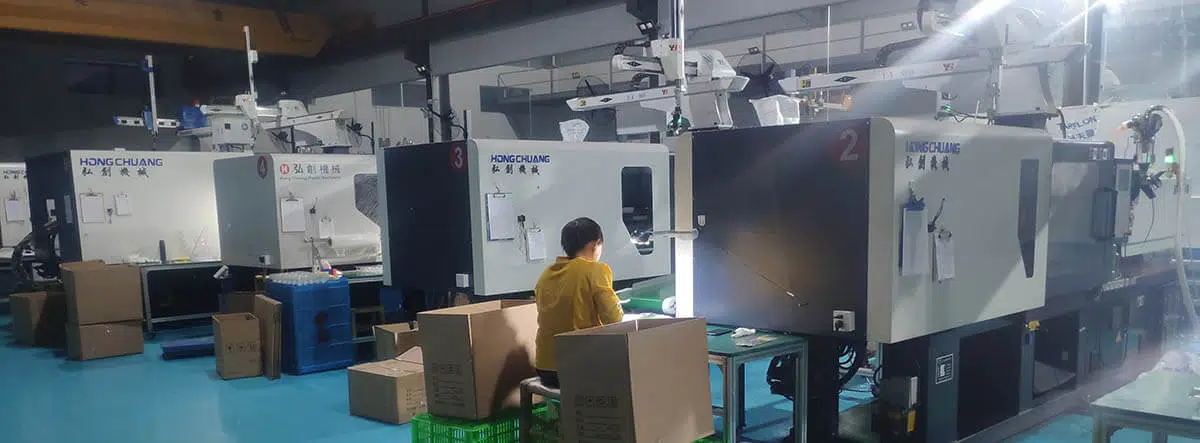
So, before getting into the details of design, we ought to get familiar with the basic mechanics of injection molding. In its simplest form, the process of injection molding works by injecting a melted form of plastic into an exact mold, which is then cooled and hardened into the required shape. The process is employed in the manufacture of everything from simple household items to complex automotive parts.

The molded part and its quality and precision greatly rely on the quality of the designed part and mold. An excellent design takes into account the flow of molten plastic, cooling, and the possibility of part flaws. Okay, so how can you design parts that satisfy these criteria?
Step 2: Material Selection
The initial question that you should ask when designing plastic parts is: what material will best suit my part? The material selected is very important as it influences strength and durability, flexibility, and surface finish.
Typical injection molding materials are:
| General Purpose Polystyrene | PS | Lampshade, instrument housing, toys, etc. |
|---|---|---|
| High Impact Polystyrene | HIPS | House ware, electrical components, toys, etc. |
| Acrylonitrile Butadiene Styrene | ABS | instrument housing,House ware, advanced toys, sports goods |
| Acrylonitrile Styrene | AS(SAN) | Daily transparent containers |
| Butadiene Styrene | BS(BDS) | Special packaging, food containers, pen, etc. |
| Acrylonitrile Styrene acrylate copolymer | ASA | Outdoor furniture,car outer mirror housing |
| Polypropylene | PP | Packing bag,packaging, daily necessities, toys, etc. |
| Chlorinated Polypropylene | PPC | Daily necessities, electrical appliances, etc. |
| Low Density Polyethylene | LDPE | Packaging bags, plastic flowers, plastic bottle, wire, packaging etc. |
| High Density Polyethylene | HDPE | Packaging, building materials, buckets, toys, etc. |
| Ethylene-Vinyl Acetate | EVA | Soles, film, sheet, tube, daily necessities, etc. |
| Chlorinated Polyethylene | CPE | Building materials, pipe, cable insulation layer, heavy packaging materials |
| Polyamide-6 | PA-6 | Bearings, gears, tubing, containers, daily necessities |
| Polyamide-66 | PA-66 | Machinery, automobile, chemical, electrical equipment, etc. |
| Polyamide-9 | PA-9 | Mechanical parts, pump, cable jacket |
| Polyamide-1010 | PA-1010 | Rope, pipe, gear, mechanical parts |
| Polymethyl Methacrylate | PMMA | Transparent decorative materials, lampshade, windshield, instrument case |
| Polymethyl Methacrylate-Styrene | MMS | transparent products with heavy loading |
| Methyl Methacrylate-Butadiene | MMB | Machine frame, frame and daily necessities, etc. |
| Polycarbonate | PC | transparent parts, resistance to impact parts |
| Polyoxymethylen e(Polyformaldeh yde) | POM | Good abrasion resistance, for mechanical gear, bearings, etc. |
| Cellulose Nitrate | CN | Spectacle frames, toys, etc. |
| Cellulose Acetate | CA | Tool handles, containers, etc. |
| Ethyl Cellulose | EC | Tool handle, sports goods, etc. |
| Poly(Ethylene Terephthalare) | PET | Bearings, chains, gears, tapes, etc. |
| Poly(Butylene Terephthalare) | PBT | |
| Poly(Vinyl Chloride) | PVC | Bar, pipe, plate, pipe, wire insulation, sealing, etc. |
| Polytetrafluoro ethylene | PTFE | High frequency electronic instruments, radar insulation components |
| Perfluorinated | ||
| Ethylene-Propylene Copolymer | FFP | High frequency electronic instruments, radar insulation components |
| Polychlorctrifl uoreethylene | PCTFE | Transparent mirror, valve fittings, etc. |
| Teflon, PFA | Chemical fittings, mechanical parts | |
| ETFE | Chemical fittings, mechanical parts | |
| polysulfone | PSU(PSF) | Electrical parts, aircraft and automotive parts, etc. |
| polyethersulfon e | PES | Electrical parts,aircraft and automotive parts, etc. |
| Chlorinated Polyethers | PENTON( CPT) | Substitute for stainless steel |
| Edit |
Your selection of material has to align with the functional requirements of the part. For example, if you are working on a part that will be under high stress, you will need a stronger material such as nylon or ABS. However, polypropylene may be a better option if your part requires flexibility and chemical resistance.
The thing is that although the choice of material is important, it may also affect your mold design. Certain materials need greater temperatures or more complicated cooling systems, so take into consideration how your material will respond during the molding process.
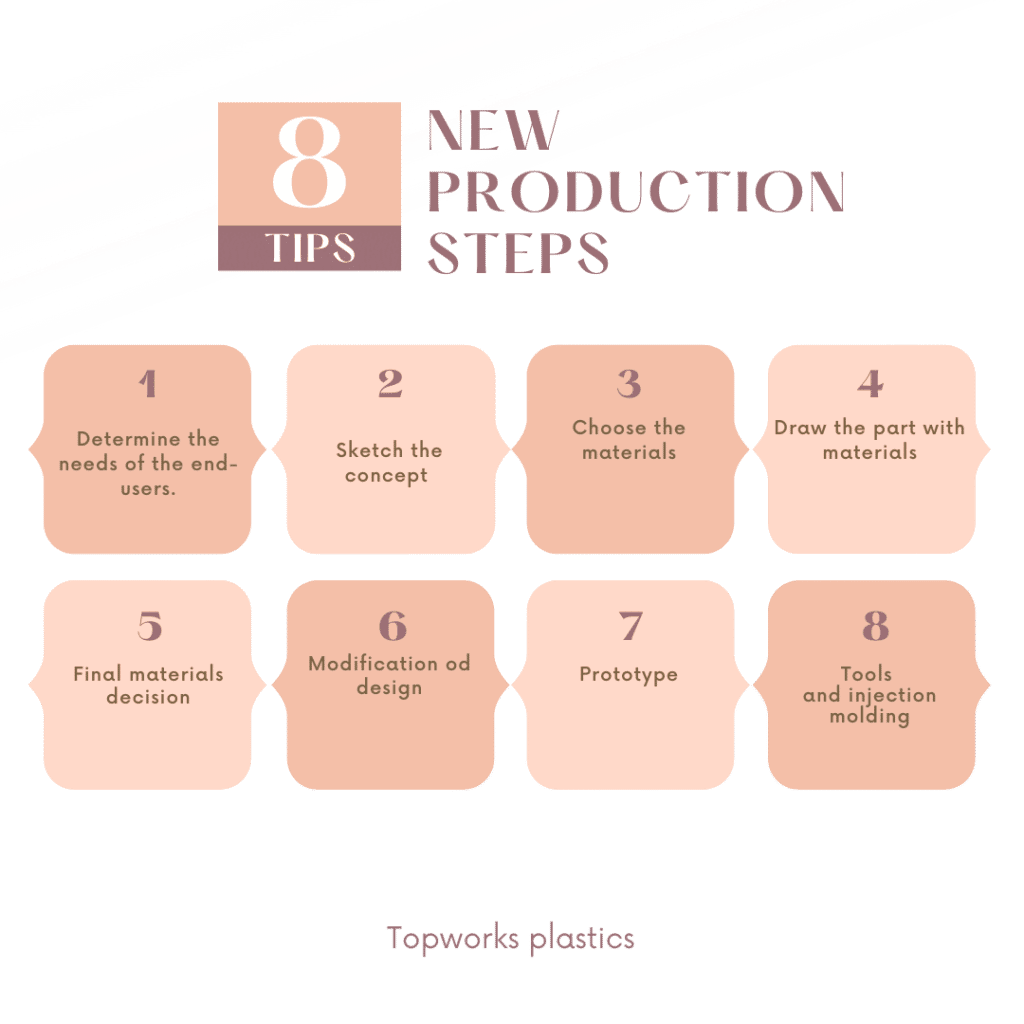
Step 3: Part Design Factors
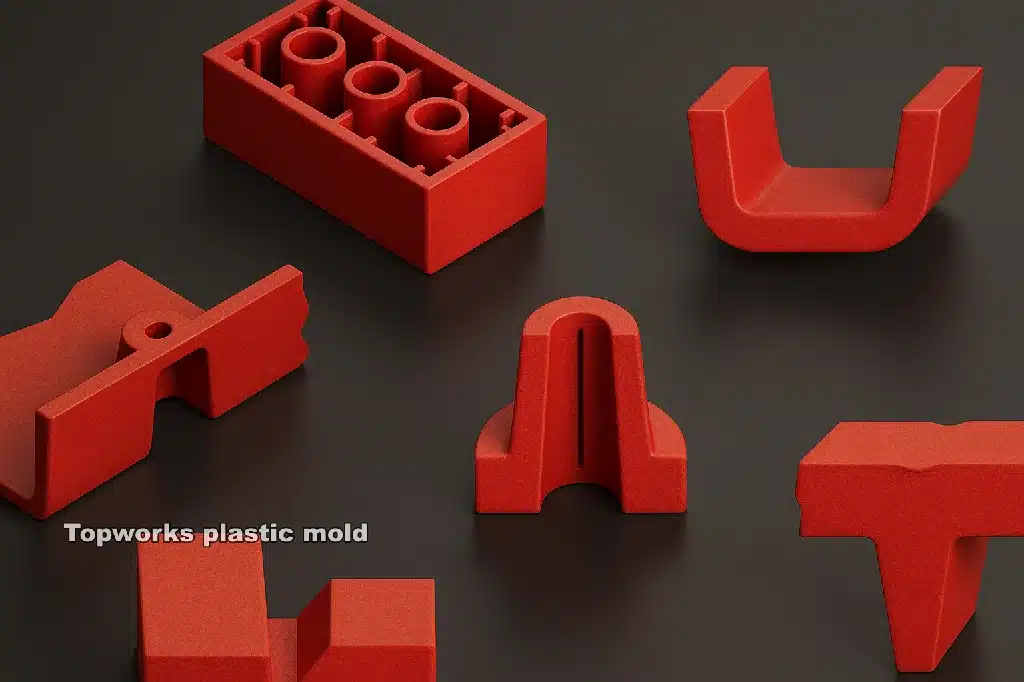
And the most important step is now: to design the actual part. The design of a part is the most important factor to ensure that it can be easily molded without flaws. A number of factors are to be taken into account here:
- Wall Thickness: As far as possible, try to have uniform wall thickness. When walls are excessively thick, the material can cool unevenly, resulting in warping. On the other hand, walls that are too thin can lead to weak sections.
- Draft Angles: These are small angles provided to the walls of the mold so that it is easier to eject the part. Your part can become trapped in the mold without the correct draft angles, causing delays and possible damage.
- Radii and Fillets: Avoid sharp corners in your design, as they may produce stress points in the part and make it prone to cracking. Instead, add some rounded corners (fillets) to assist in the even distribution of stress.
- Undercuts: Undercuts are unavoidable at times but may complicate the molding process due to a more complex mold. Attempt to design your part so that it does not have undercuts if possible.
Basically, it all begins in the design process. And like any creative process, it needs to be planned, detailed, and a touch of skill. Step by step.
These are just some of the fundamentals that should be considered when creating a part. The idea is to ensure your part is simple to produce while fulfilling its functional needs.
Step 4: Mold Design
The part design is as important as the mold design itself. The mold should fit the process of material flow, cooling, and ejection, while the final part must align with the intended design.
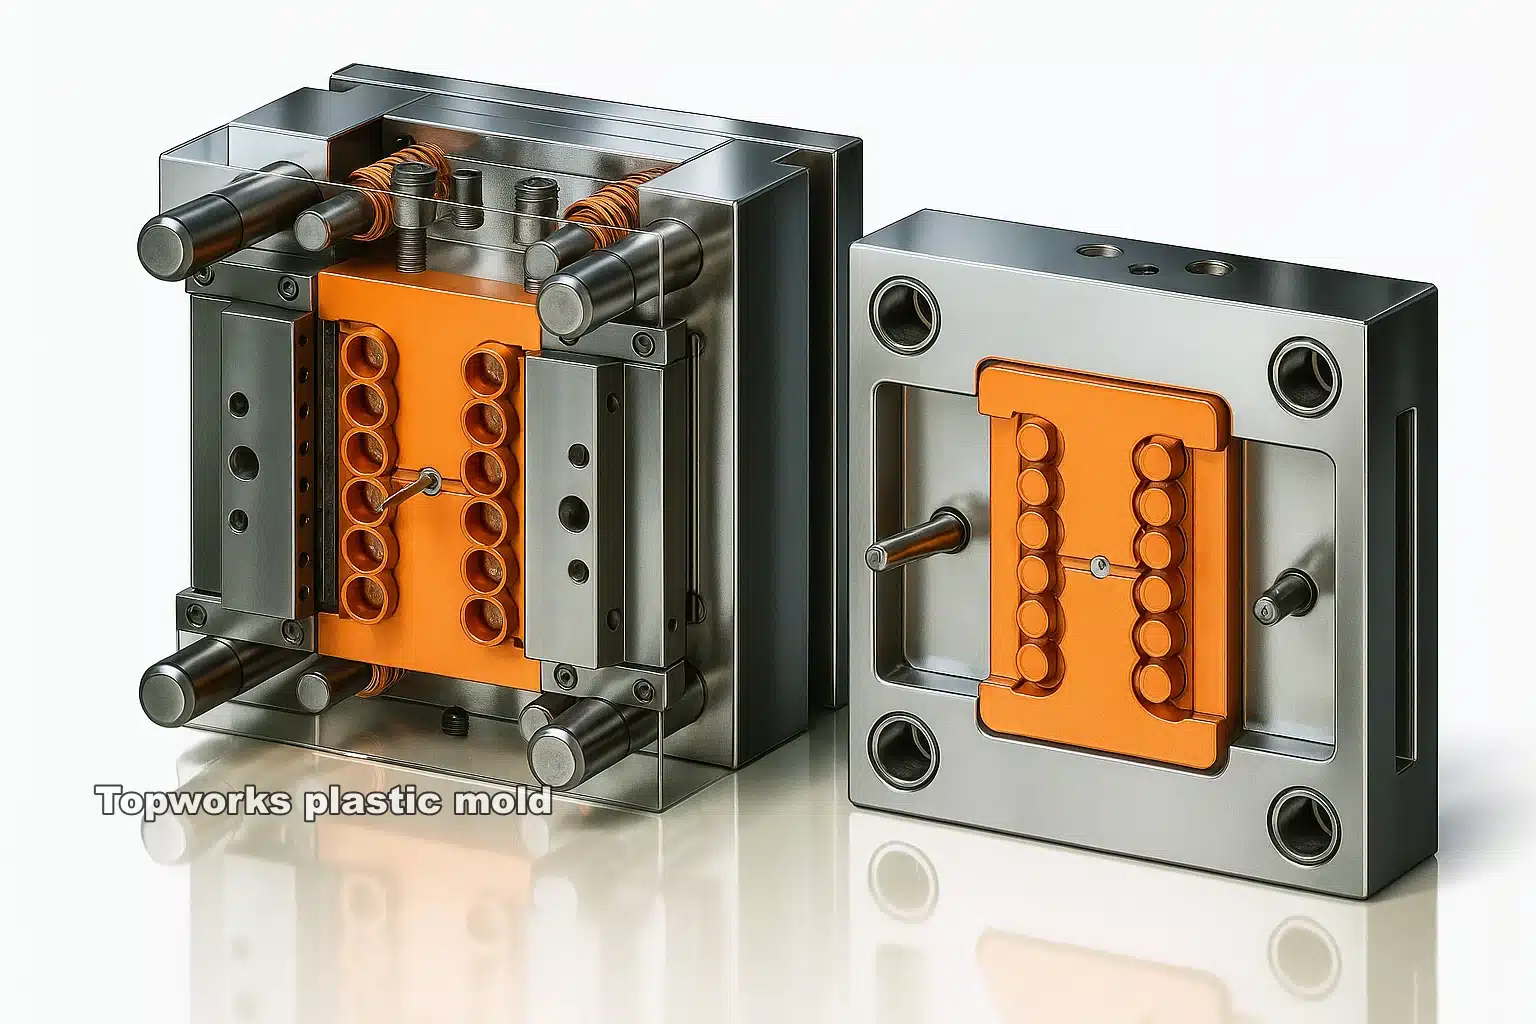
Some of the mold design factors to consider are as follows:
- Gate Design: Gates are the locations where the molten plastic is injected into the mold. Placement of gates is paramount to the uniformity of the flow of plastic and to prevent defects like air traps or weld lines. Most of the time, you will want gates positioned to reduce material wastage while ensuring a smooth fill.
- Venting: Lack of proper venting may result in air being trapped in the mold, leading to defects such as short shots or burn marks. Ensure that there are vents in the mold design so that air can escape when the material fills the mold.
- Cooling Channels: Cooling is a necessary component of injection molding. Efficient cooling systems maintain cycle times and help avoid defects. Cooling channels should be designed to evenly distribute temperature across the mold.
- Ejection Mechanism: After the solidification of the part, it must be ejected from the mold. Depending on the shape and size of the part, ejection systems may be as basic as pins or more complex.
Step 5: Prototype

It is helpful to test your design before making the choice to mass produce. Prototyping gives you a chance to create a physical sample of your part, allowing you to identify any design flaws and correct them before they become costly problems during full-scale production.
Prototyping assists you to:
- Test Functionality: Ensure the part functions as anticipated in real scenarios.
- Assess Aesthetics: Verify that the surface finish and visual appearance align with design requirements.
- Identify Manufacturing Problems: Locate any issues with molding, warping, weak spots, or excessive material waste.
At this point, you will probably have to revert and adjust the design depending on the test results. When you hit setbacks, don’t be discouraged; that is what prototyping is all about—making the design perfect.
Step 6: Final Production
After you have settled on your design and confirmed that the prototype works, it is time to go into full production. However, prior to doing so, you should not overlook quality control (QC). QC is crucial to ensure every component meets your specifications.
Some of the major quality checks are:
- Dimensional Accuracy: Ensure that measurements align with design specs.
- Surface Finish: Check the part for defects, including blemishes and scratches.
- Strength and Durability: Some parts may need testing for mechanical strength, such as tensile strength or impact resistance, depending on the application.
Quality control can eliminate expensive errors that occur later and ensure your parts are ready for customers.
Conclusion – Optimizing the Process
Injection molding of plastic parts is a complicated and enjoyable experience in design. It involves a combination of creativity, technical expertise, and insight into manufacturing processes. With a systematic, straightforward procedure, you can create parts that are not only functional but also manufacturable, starting from material selection to final quality checks.
The key to success lies in planning in advance, maintaining open communication with your manufacturer, and being prepared to make changes to the design based on feedback and prototyping results. As you gain more time and experience, you will find that you have better control over the design of plastic parts and more confidence in creating components that fulfill both functional and aesthetic requirements.
Designing is not a one-size-fits-all project; each product is distinct. However, armed with a good knowledge of the underlying principles, you should be well placed to confront anything that comes your way. Happy designing!
| Materials | Plastic manufacturers often select a standard grade of plastic for a similar application or based on supplier recommendations. However, these resins may not be optimal. In plastic selection, there are many factors to consider, including: |
|---|---|
| Heat: The stress created by normal and extreme conditions of use and during the assembly, finishing, and shipping processes. | |
| Chemical resistance is a property affecting part performance when solids, liquids, or gases are in contact. | |
| Agency approvals: Standards developed by the government or the private sector for properties like heat resistance, flammability, and mechanical and electrical performance. | |
| Assemblage: During the assembly process at plastic factory, the plastic is bonded, mechanically fastened, and welded. | |
| Finish: Ability of the material to come out of the mold with the desired appearance values, such as gloss and smoothness. | |
| Price: The price of resin, costs of manufacturing, maintenance, assembly, disassembly, and other costs to reduce labor, finishing, and tools. | |
| Access: The availability of resin from the point of view of the amount required for production of plastic manufacturer. | |
| Draft | A draft angle makes it easier to remove a cooled, finished part from a mold . Draft angles are an essential component of injection molding. Minimizing friction during the part release process can achieve a uniform surface finish and reduced wear and tear on the mold at plastic factory. |
| An angle of the draft is measured according to the direction of pull. Draft angles of at least 0.5° for the cavity and 1.0° for the core are suggested by most design engineers for parts with sufficient draft. The tool must also be designed with more draft if a textured surface is desired and steel shut-off surfaces. | |
| Wall Thickness | The wall thickness of injection molded parts is also an important consideration. An injection molded part from plastic products supplier with a proper and uniform wall thickness is less prone to structural and cosmetic problems. |
| Most resins have a typical wall thickness ranging from .04 – .150. Yet, it is recommended that you obtain thickness specifications for your material(s) of choice by consulting with an injection molder/design engineer and plastic manufacturer. | |
| Wall thickness should be analyzed during the design process to ensure that parts don’t sink, warp, or become non-functional. | |
| Ribs | As ribs are used to reinforce the walls of your injection molded parts without increasing their thickness, they are a valuable component in injection molded parts. Rib design should reduce mold flow length when designing complex parts and ensure that the ribs are appropriately connected to increase the part’s strength. |
| Ribs should not exceed 2/3 of the wall thickness, depending on the material used. WIDE ribs may create sinking and design problems. It is typical for a design engineer and plastic manufacturer to core out some fabric to reduce shrinkage and keep the strength. | |
| If the height of the ribs exceeds 3 times the wall thickness, this could result in the part being short/unable to be filled. Rib placement, thickness, and length are critical factors in determining the viability of a part in its early design phases. | |
| Gate | In a mold part, a gate is a point at which liquid plastic flows into it. Injection molded parts have at least one gate, but they are often produced with multiple gates. Runner and gate locations influence polymer molecules’ orientation and how the part shrinks during cooling. As a result, gate location affects your part’s design and functionality. |
| The gate should be placed at the end of a long and narrow part if it must be straight. It is recommended to have a gate positioned in the centre of parts that must be perfectly round. | |
| With the input of your plastic manufacturer team, you will be able to make optimal decisions regarding gate placement and injection points. | |
| Ejector Pin | Mold ejector pins (located on the B-side/core of the mold) are used to release plastic parts from a mold after being molded. The design and positioning of ejector pins should be considered as early in the process as possible by plastic manufacturers. This is even though they are usually a relatively minor concern in the early design phases. Indentations and marks can result from improperly placed ejector pins, so proper placement should be considered in the early phases. |
| Ejector pins are typically located at the bottom of side walls, depending on the draft, texture, depth, and type of material. You might be able to confirm that your initial ejector pin placement was correct by reviewing the design. In addition, you may be able to make further changes to improve production outcomes. | |
| Sink | Sink marks can appear on the injection molded plastic part during injection moulding when the material shrinks more in thicker areas such as ribs and bosses. In this case, the sink mark is caused by thicker areas cooling slower than thin ones, and the different cooling rates lead to a depression on the adjoining wall. |
| Sink marks are formed due to several factors including the processing method, the geometry of the part, the material selection, and the tooling design. The geometry and material selection of the part may not be able to be adjusted based on its specifications, but there are several options to eliminate sink areas. | |
| Sinking can be influenced by tooling design (e.g., cooling channel design, gate type and gate size), depending on the part and its application. The manipulation of process conditions (for example, packing pressure, time, phase of packing, and conditions) can also reduce sink. Further, minor tool modifications (e.g., foaming or gas assist) can reduce sink. It is best to consult your injection molder and plastic manufacturer regarding the most effective method to minimize sink in injection-molded parts. | |
| Parting Lines | For more complex parts and/or complex shapes, it is important to note where the parting line is located. |
| Having your design shared with your injection molder can greatly influence your finished product’s production and functionality since designers and molders tend to evaluate parts differently. The challenge of parting lines can be addressed in several ways. | |
| It’s important to be aware of the importance of the parting line when designing your initial concept, but you are not limited to that. You may be able to locate other possible locations using CAD software and mold flow analysis. When you work with an injection molder, they keep your part end use in mind and help you determine where the parting lines should be placed. | |
| Special Features | It is essential to design plastic parts so that mold tools can open them and eject them without difficulty. Injection molds release parts by separating the two sides in opposite directions. A side action may be necessary in some instances, where special features such as holes, undercuts, or shoulders prevent the release from occurring. |
| Coring is pulled in a direction opposite that of mold separation as a side action. In some cases, costs may increase due to this flexibility in part design. | |
| When designing and developing a product, you (plastic manufacturers )were having the right injection molder, and engineer on your side is essential. You can avoid many issues by working with them. In integrating these elements into your product design process and working with a plastics engineer who has experience with these materials, your goal will be to get your product to market as quickly and cost-effectively as possible. |