“Can You Quote This Part From a Few Photos?”
Short answer: No. But don’t worry — this guide explains why in plain English, and shows you exactly what to do instead.
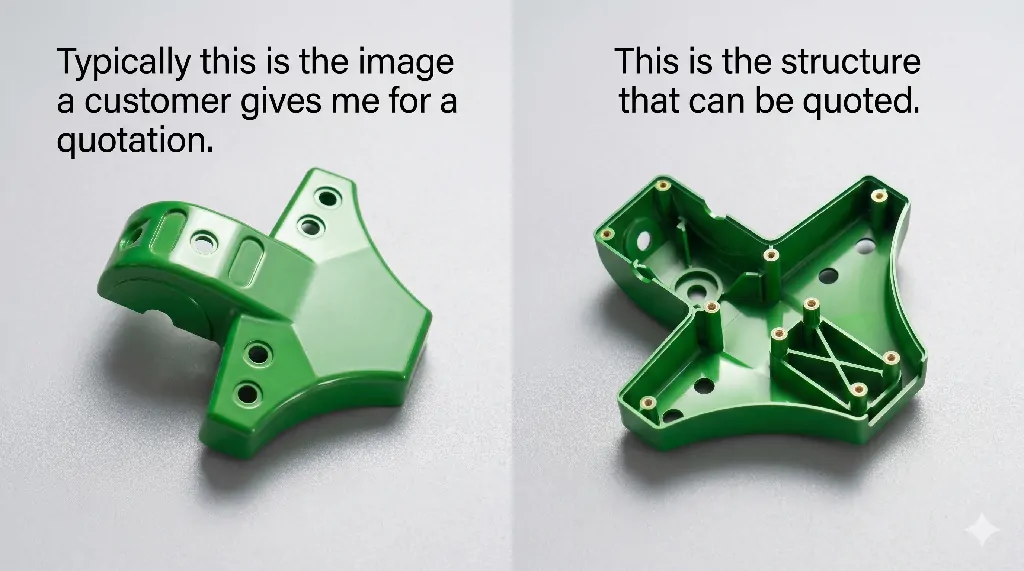
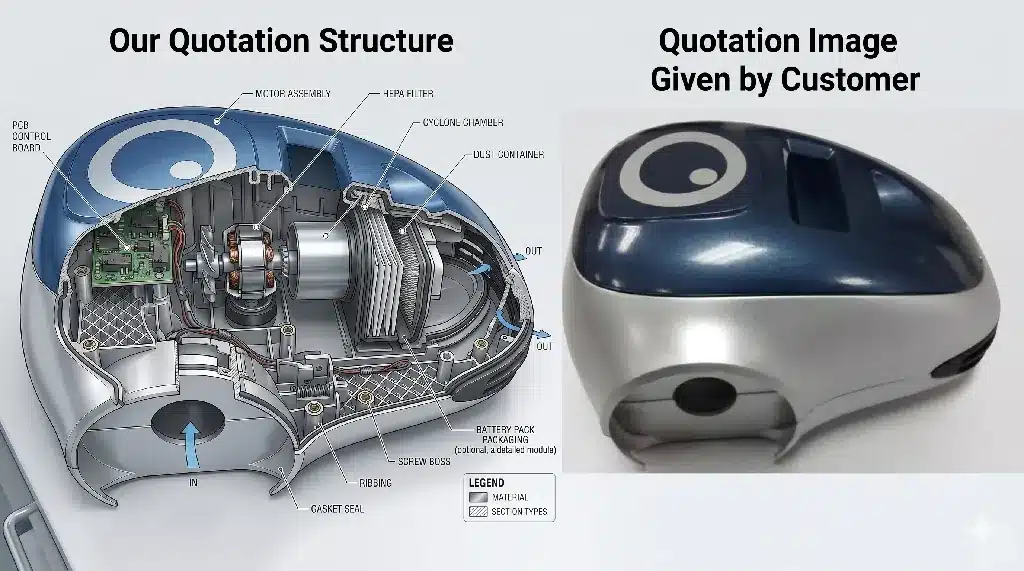
Why Photos Alone Don’t Work
We get it — you have a product idea, you have some photos or a sketch, and you just want to know: “How much will this cost to make?” It’s a totally reasonable question. But asking a mold maker to quote a part from photos alone is like asking a builder to quote a house from a snapshot of the front door.
Imagine you send a photo of a house to a contractor and ask: “How much to build this?” They’d need to know: How many rooms? What are the dimensions? What materials? Is there a basement? Plumbing and electrical? A photo of the outside tells them almost nothing about what’s inside or how it’s built. Your plastic part is the same.
What You See vs. What Matters
The visible info in a photo is just the tip of the iceberg. The factors that actually drive cost sit beneath the surface.
What Actually Determines the Price?
An injection molding quote has two main parts: the mold (tooling) — a one-time cost, and the parts — per-piece cost. Both depend on details a photo cannot reveal.
+
Material × Qty
+
Cycle Time × Qty
+
Finishing
Asking for a mold price from a photo is like calling a pizza shop with: “I want a pizza, how much?” They need to know size, toppings, crust type, delivery, and quantity. Without those details the best they can say is “Somewhere between $8 and $80.”
Why One Side Hole Can Double Your Mold Price
Here’s a perfect example of why photos lie. A small hole on the side of your part looks like nothing — but it can add $3,000–$8,000 to your mold cost. Here’s why.

A standard injection mold opens in one direction — the two halves pull straight apart, and your part pops out. Simple. Cheap. Fast.
But the moment you add a hole on the side of the part (perpendicular to the opening direction), that hole becomes an undercut. The mold physically cannot release the part — the steel is in the way. You need a slider (also called a side-action or lifter): a separate piece of the mold that pulls sideways before the mold opens, then resets for the next shot.
Send us your CAD before you finalize the design. We’ll flag every slider, lifter, and undercut in your part — and tell you which ones can be designed out to save $3k–$8k each. No charge. Get a free DFM review →
What a Slider Actually Adds to Your Bill
Before you commit to a side hole, ask your engineer: “Can this hole be moved to the top or bottom?” Or: “Can it be drilled as a secondary operation after molding?” A 2-minute conversation at the CAD stage can save $5,000 on tooling and reduce your per-part cycle time. This is exactly why DFM (Design for Manufacturing) review matters before you cut steel.
How to Get a Real, Accurate Quote
Five steps from “I have an idea” to “I have an accurate price.” You don’t need to be an engineer — just follow this roadmap.
Get a 3D CAD File Made
A 3D CAD file is the digital blueprint of your part — every dimension, wall thickness, hole size, and curve.
File format: STEP (.stp) or IGES (.igs). Avoid STL files.
$500 – $3 000 for CAD design
Choose Your Material
| If your part needs to… | Common Material |
|---|---|
| Be cheap/general-purpose | PP |
| Be tough/look good | ABS |
| Handle heat/force | Nylon (PA) |
The Golden Rule
No 3D CAD file = No real quote.
Invest in a proper CAD design first — it pays for itself many times over.

