what is injection molding of plastics

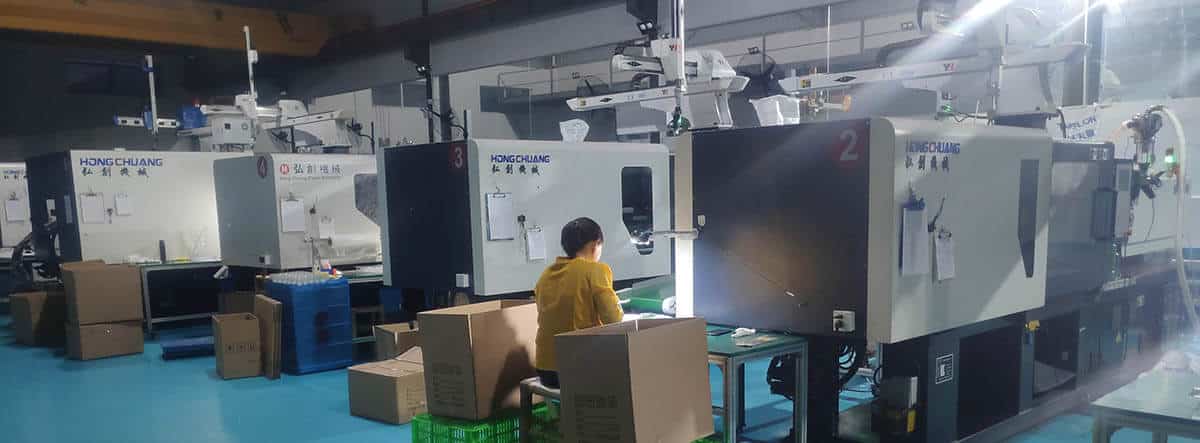
The process of injection molding of plastics involves the usage of molds to create parts through material injection. The plastic manufacturing industry uses this method for component creation because it delivers precision results and high efficiency together with the ability to create intricate shapes. Manufacturers in automotive, consumer goods, and medical device sectors prefer this method because it combines cost efficiency with scalability.
What Is Injection Molding?
7 key points explaining injection molding clearly
Injection molding is a manufacturing process used to produce plastic parts by injecting molten plastic into a precision mold under high pressure.
After the plastic cools and solidifies, the mold opens and the finished part is ejected. This process allows manufacturers to produce large quantities of identical parts with high accuracy and consistency.
The injection molding process consists of four main steps:
Clamping: The mold is closed and clamped tightly by the machine.
Injection: Molten plastic is injected into the mold cavity through a runner and gate system.
Cooling: The plastic cools and solidifies into the desired shape.
Ejection: The mold opens and ejector pins push the finished part out.
Injection molding commonly uses thermoplastics, including:
ABS: Strong, impact-resistant, good surface finish.
Polypropylene (PP): Lightweight, chemical resistant, flexible.
Polycarbonate (PC): Transparent and high impact strength.
Nylon (PA): High strength and wear resistance.
Injection molding is ideal for producing:
• High-volume plastic parts
• Complex geometries with tight tolerances
• Parts with consistent dimensions and surface finish
• Components used in automotive, medical, electronics, and consumer products
Key advantages include:
• High production efficiency
• Excellent repeatability and accuracy
• Low material waste
• Ability to mold complex shapes
• Low per-part cost at high volumes
Despite its benefits, injection molding has some limitations:
• High initial mold cost
• Long tooling lead time
• Design changes after mold fabrication can be expensive
• Not economical for very low production volumes
Injection molding is the best choice when you need:
• Medium to high production volumes
• Tight tolerances and consistent quality
• Durable plastic parts with good surface finish
• Scalable manufacturing for long-term production
Injection Molding Process: A Complete Overview
Injection molding is a high-volume manufacturing process in which molten thermoplastic resin is injected under pressure into a precision mold cavity, then cooled and ejected as a finished part. It is widely used across automotive, consumer electronics, medical devices, and packaging industries.
The six stages of injection molding
- Clamping — The two mold halves are closed and locked by the clamping unit before injection begins.
- Injection — Molten resin is injected into the mold cavity at controlled speed and pressure.
- Dwelling (holding) — Holding pressure is maintained to compensate for material shrinkage.
- Cooling — The part solidifies inside the mold; cooling time depends on wall thickness and resin.
- Mold opening — The clamping unit retracts and the mold halves separate.
- Ejection — Ejector pins push the finished part out of the cavity; the cycle repeats.
Injection molding design tips

It is possible to make simple to extremely complicated injection molded plastic parts, as well as millions of identical items, thanks to the scalability and uniformity of the process. Tool building and maintenance are expensive, and changing tools is a challenge.
Injection molded parts: maximize their benefits
- Consistency is key. Make sure your walls are the same thickness throughout your part. Walls should be 2-3mm thick on average. Standard injection molding processes recommend a minimum of 1mm and a maximum of 4mm.
- Smooth trumps sharp. Smooth out wall transitions whenever possible.
- Draft. A draft angle can cause design challenges in your part. Adding a draft angle to your faces is helpful for releasing the part from the tool, but it can also cause problems, specifically with mate parts. On untextured core surfaces and at least three degrees on textured cavity surfaces, a minimum draft angle of one degree is recommended.
- If possible, stay away from surfaces with zero draft. In the case of a zero-draft area, you should aim to limit it to just a portion of the face, rather than the entire surface.
- Keep it simple. Attempt to prevent undercutting (forming an area that cannot be shaped simply by opening and closing the tool). When simple won't work, lifter and slides allow features to be formed that are undercuts in the main pull direction. If so, leave at least 2 to 3 times the width of the feature to allow the lifter or slide to travel.
- Flow from thick to thin. Plastic will flow through features better if it flows from thicker to thinner walls beginning at the gate (where the plastic flows into the part to fill it).
- It is bad to have sinks (densities on surfaces caused by thicker sections of plastic slowing down as they cool). It is important to follow these guidelines in order to minimize or eliminate the appearance of blemishes on cosmetic surfaces:
- Make sure that important cosmetic surfaces do not have gates, ribs, screw bosses, etc. on the backside;
- There should be three times less rib height than wall thickness;
- 60% or less of the wall thickness should be used for rib bases.
- Territories are defined by datums. To establish the interface and interaction between parts, use datums (features that serve as reference points for the parts). When a design intent is matched to a datum structure, a product can function properly.
- There is nothing wrong with interrogation. In DFM (Design for Manufacturing) reports, the molder communicates his understanding of the design, especially in regards to pin locations, gate locations, and parting lines (which could affect how parts interact). Interrogate the design by using inspection reports.
- Create prototypes often and early. Present prototyping techniques, including 3D printing, can reduce material costs by allowing components, and/or the entire part, to be modeled in advance of building expensive tooling.
Injection Molding Design Guidelines
Essential rules for strong, manufacturable plastic parts. All values reference nominal wall thickness T, hole diameter D, or hole width W.
Geometry
Wall Thickness
Inconsistent thickness causes warping and sink marks.
Corner Radii
Reduces stress concentration and improves plastic flow.
Draft Angles
Ribs
Holes
Add bosses and connecting ribs for reinforcement.
Process
Material Selection
Choice drives required wall thickness and draft angles.
Ejection & Parting
Simplifies mold design and reduces post-processing.
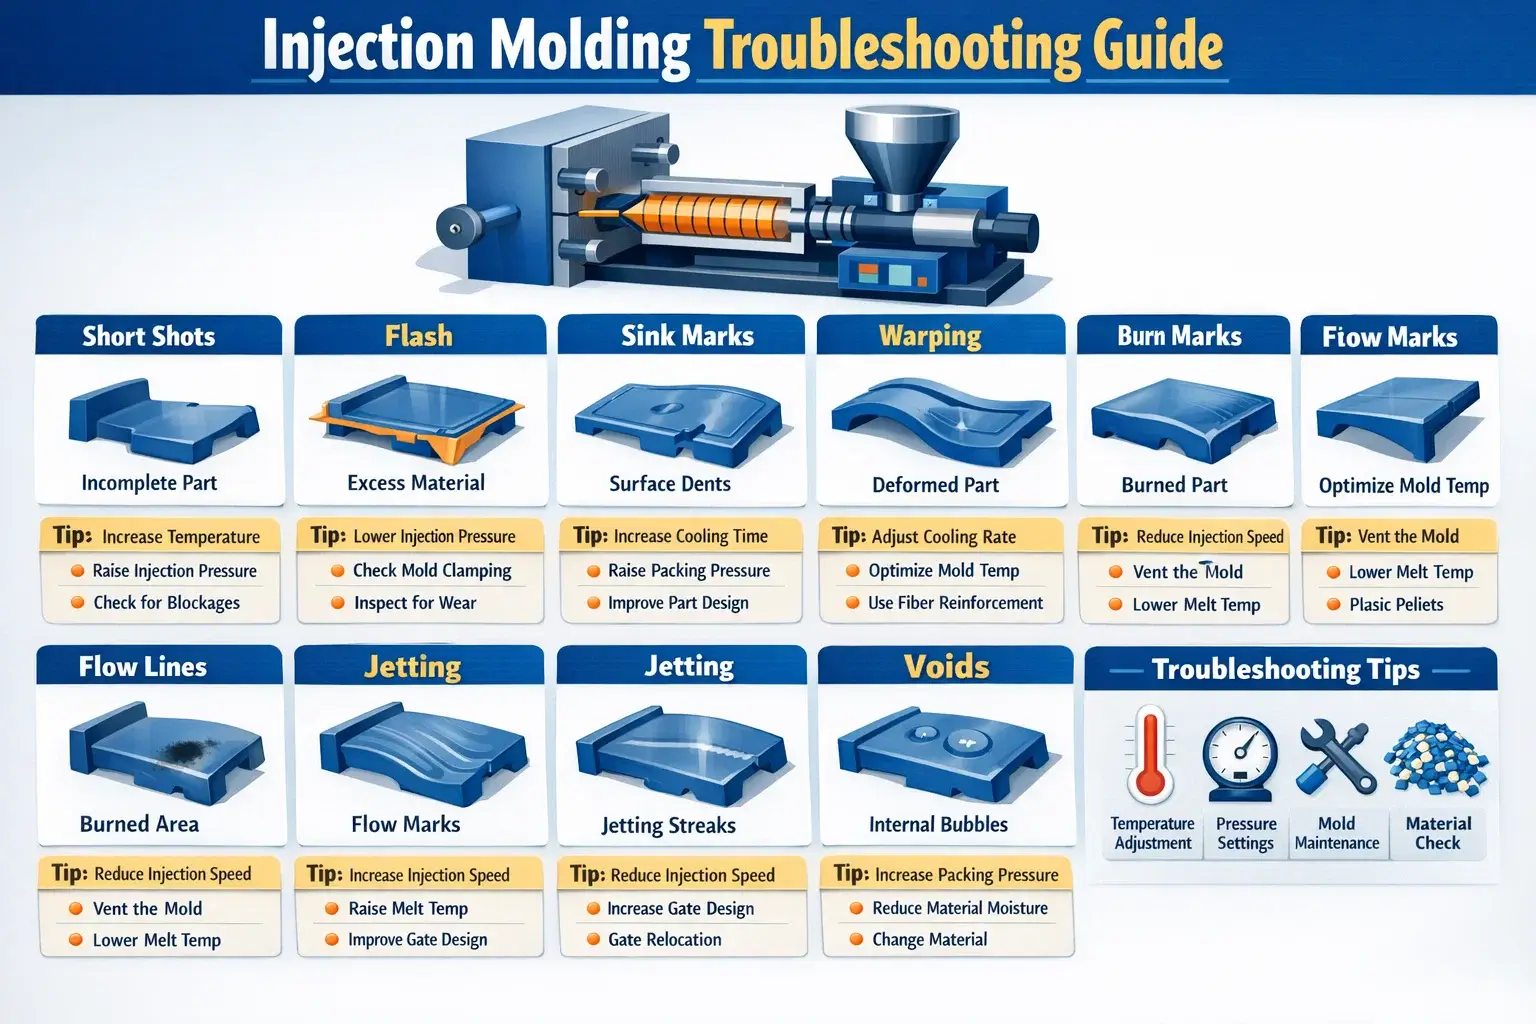
injection molding troubleshooting
1. SELECT DEFECT TO TROUBLESHOOT:
Pros and Cons of Plastic Injection Molding
| Category | Pros (Advantages) | Cons (Disadvantages) |
|---|---|---|
| Accuracy | High precision and repeatability. Capable of producing complex and detailed geometries. | High precision also means errors in design can lead to costly defects. |
| Production Speed | Very fast cycle time (about 15–20 seconds). Ideal for high-volume mass production. | Initial setup and mold design can take weeks or months. |
| Cost Efficiency | Low cost per unit in large-scale production. Automation reduces labor costs. | High upfront costs for molds, machines, and tooling. |
| Labor Requirements | Mostly automated; fewer operators needed once production starts. | Requires skilled technicians for mold design, setup, and quality control. |
| Versatility | Suitable for a wide range of products, from small electronic parts to large automotive components. | Limited by machine size and material constraints. |
| Sustainability | Minimal material waste during production. Some plastics can be recycled and reused. | Difficult to recycle complex or multi-material molded parts. |
| Product Quality | Consistent quality across large production runs. | Possible defects such as warping, sink marks, or flash if process is not optimized. |
| Scalability | Excellent for large-scale and continuous manufacturing. | Not cost-effective for small batch or low-volume production. |
The 6 Different Types of Plastic Molding
There are several different types of plastic molding, each with its own unique characteristics and benefits. Here are six common types of plastic molding:
- Injection molding: This is a common method of producing large quantities of plastic parts. It involves injecting molten plastic into a mold cavity, where it cools and solidifies into the desired shape. Injection molding is fast and efficient, and it can produce highly precise and consistent parts.
- Blow molding: This process is used to produce hollow plastic parts, such as bottles and containers. It involves heating plastic until it is pliable, then using air pressure to blow it into a mold cavity. Blow molding is often used for large, complex parts with thin walls.
- Extrusion molding: In this process, plastic is melted and forced through a die to create a continuous shape, such as a pipe or a sheet. The resulting shape is then cut to the desired length. Extrusion molding is often used for products with a constant cross-section, such as pipes and tubes.
- Thermoforming: This process involves heating a sheet of plastic until it is pliable, then forming it over a mold using vacuum pressure. Thermoforming is used to produce a wide range of products, including cups, trays, and packaging materials.
- Rotational molding: In this process, a mold is filled with powdered plastic and then rotated in an oven to distribute the plastic evenly. The mold is then cooled, and the resulting part is removed. Rotational molding is often used for large, hollow parts with complex shapes.
- Compression molding: This process involves heating a plastic charge and pressing it into a mold cavity under high pressure. Compression molding is typically used for medium- to high-volume production of parts with simple shapes and uniform wall thicknesses.